Showing posts with label appetizer. Show all posts

Cheese Toasts


I have shared this retro cheese toast recipe several times over the years but recently realized that I hadn't actually written out a "formal" recipe. I'm here to fix that!

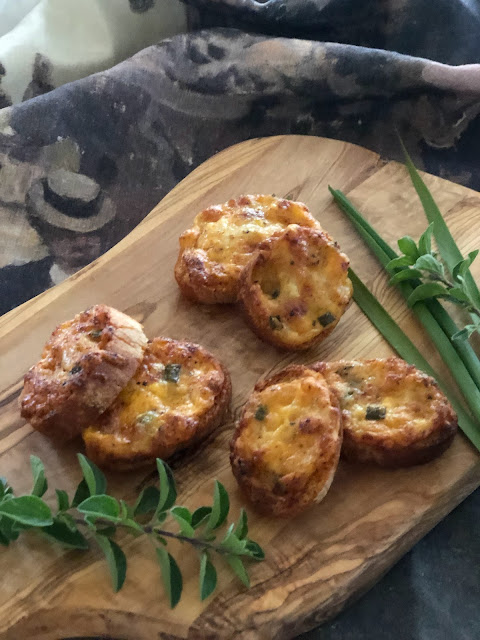
Every 60s hostess had a cheese toast recipe in her recipe arsenal. My mother made these regularly and I remember her using a mix of leftover cheeses, as in whatever she had on hand. I always like to have sharp cheddar, gruyere and parmesan, but have made them with just about everything. The one pictured  above has fontina and jack in them too. My mother often added blue cheese but I find that too overpowering. The point is, just use your favorite cheeses and bits of this and that are just fine. You could elevate it by adding flaked crab, canned or fresh, but then you must serve it with champagne, just because!

Kids LOVE these. Just warning you in advance.

Retro Cheese Toasts

You will need 1 sliced baguette.

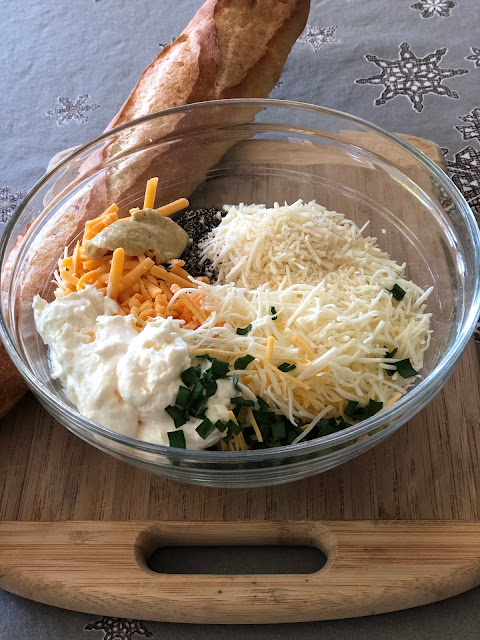
Start with 1 1/2 cups grated mixed favorite hard cheeses and mix in enough mayonnaise to make a spreadable mixture, I would guess about a half cup but I've never measured. It's an "add and stir until you get it right" mixture.

Mix in one, two, or more of these add ons:

chopped chives

thinly sliced green onions

finely chopped pimientos

finely chopped green or black olives

drained capers

a heaping spoon of pesto or chopped chutney

chopped, drained tomatoes

1 tsp of your favorite dried herb or a tablespoon of your favorite fresh, minced herb

1-2 tsp of curry

1/4 tsp nutmeg

1/2 tsp freshly cracked black pepper

2 tsp prepared mustard

1 can drained crab or 1/2-1 C flaked fresh cooked crab or tiny bay shrimp

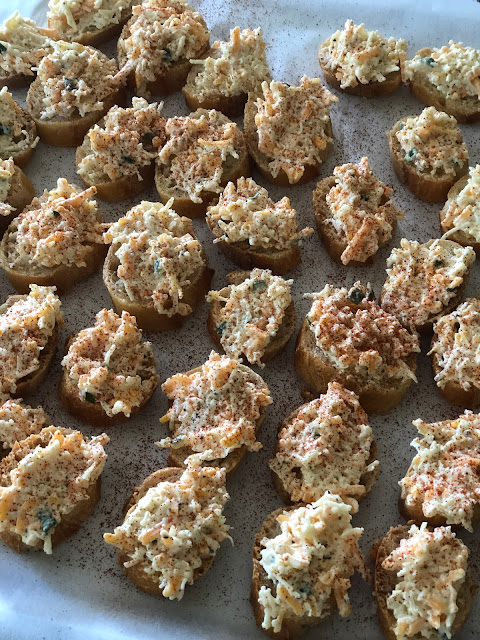
Spread mixture on bread slices.  Sprinkle with paprika, cracked black pepper or additional herbs if desired. At this point, cheese toasts can be flash frozen on a baking sheet. After a few hours in the freezer and they are frozen solid, place in freezer bags. They will keep nicely for up to a month and are very handy for the busy hostess. To bake: line a baking sheet with parchment paper or foil for easy clean up. Place rack on top and place toasts on top of rack. Bake frozen toasts in a hot oven, 375 F for about 8 minutes or until cheese is bubbly and lightly browned in spots. Unfrozen slices take a little less time. Baking them on a rack is optional, but it crisps up the bottoms nicely. Makes about 3 dozen.
Nectarine and Burrata Appetizer


This appetizer is just what summer entertaining means to me—easy,  beautiful and using the season's best produce. It just shouts SUMMER!

Medium chop two ripe nectarines and finely chop one seeded jalapeno pepper. Toss together with a splash of olive oil, salt and pepper to taste, and a handful of chopped cilantro. Place on a plate with a good piece of burrata cheese, sprinkle with a half cup of toasted pistachio nuts and serve with crackers or sliced baguette.  Every bite was a combination of cool and sweet, spicy and salty, creamy and crunchy. Divine.

Curried Cashews


Curried Cashews

My girlfriend, Rene, cut this from a magazine years ago, but doesn't remember the source.  Since she gave me the recipe, I've made it quite a few times. I love it in a pretty bowl on the drinks table before a dinner party.  It's very popular with everyone, even with people who think they don't like curry.

2 Tbsp. sugar
1 Tbsp. kosher or flake salt
2 1/2 tsp. curry powder
3/4 tsp. ground cumin
3/4 tsp. ground coriander
1/4 C water
1 Tbsp. brown sugar
2 Tbsp. butter
2 1/2 C unsalted roasted cashews (about 12 oz.)
1 C unsalted raw shelled pistachios (4 oz.)
1/2 C dried cranberries

Place rack in middle of oven and preheat to 300F.  Combine the first 5 ingredients in a large bowl and set aside.  Bring the water, brown sugar and butter to a boil, stirring often.  Stir in the nuts.  Cook, stirring constantly until the nuts are shiny and the liquid has evaporated, about 3 minutes.  Transfer the nuts to the spice mixture.  Add the dried cranberries; toss until well coated.  Spread the mixture out onto a baking sheet and bake for 15 minutes.  Cool to room temperature.  Store in an airtight container at room temperature for several weeks.


Follow 
Knitionary

Gougere


Gougere

This beautiful, savory, French pastry smells heavenly while it's baking.  It is simple elegance when served as a first course with a glass of champagne, and is something your guests won't forget.  But perhaps the best thing about a Gougere, and one thing that many cooks don't realize,  it's super easy to make and can be prepared in the morning, refrigerated, and baked just before serving.  

1 C milk
1/2 C (one stick) butter
1 tsp. salt
1 C flour
5 eggs
1 TBSP prepared Dijon style mustard
1 TBSP chopped fresh herbs (optional)  I like to use tarragon and chives if I have them.
1 C grated Gruyere cheese
1/2 C grated fresh Parmesan cheese (plus an optional two tablespoons to top the puff) 

Combine milk, butter, and salt in a small saucepan and bring to a boil.  Remove pan from heat and immediately dump in all the flour.  Stir vigorously for one minute with a wooden spoon until the mixture leaves the side of the pan and forms a mass in the middle.  Let rest for 5 minutes.  Put mixture in food processor, and process with steel blade adding the 5 eggs, one at a time.  Add prepared mustard and optional herbs and pulse a few times to incorporate.  Add both cheeses and pulse until just just mixed.  

On a parchment paper lined cookie sheet, and with a large spoon, plop spoonfuls down in a wreath-like shape, see below.  Sprinkle with optional 2 Tbsp. Parmesan cheese and a few chopped fresh herbs if desired. 

At this point you can loosely cover with plastic wrap and put in the refrigerator.  About one hour before serving, take out of the refrigerator to get to room temperature.  To bake, put in center rack of preheated 375F oven and bake for 20-30 minutes or until puffed and golden brown.  Immediately slice into wedges and serve with a fork.  Serves 6-8 as an appetizer or first course.   It's particularly memorable when served with champagne.

If you have a crowd for cocktails, gougere can also be made into little puffs making it easier to serve.


Follow 
Knitionary

summer pesto with a few variations


I profess an undying love for pesto and make it all summer long.  At the end of summer, my last batch is frozen into logs or ice cube trays to add a welcome zip of summer to winter soups and stews.  This recipe makes close to 2 cups and can easily be halved.
  • 1 large bunch fresh basil, stems and flowers removed
  • 1 C. freshly grated Parmesan cheese
  • 1 C. lightly toasted pine nuts (toast them under the broiler or on the stove in a dry pan, but toast them you must, this is an important step!)
  • 2 garlic cloves
  • the juice of 1/2 small lemon
  • 1/2 tsp. salt
  • 1/4 to 1/2 C. best quality olive oil
Whirl first 6 ingredients in food processor for one minute.  Drizzle in olive oil until the consistency you prefer.  If you plan on serving this later, put in a ramekin and paint the top with a light coat of olive oil or lemon juice to prevent discoloration.  Refrigerate leftovers.  Freezes well.

Variations:

Add a few mint leaves, more or less to taste, for a hint of mint.
Add a few nasturtium leaves, more or less to taste, for a light, peppery taste.

Click here for printable recipe.


A summertime hostess gift.


Follow 
Knitionary

stuffed nasturtium blossoms

If you've ever planted nasturtium seeds once, you know you'll never be without them again.  They are the most prolific reseeders of the garden and happily grow up and around every flower and veggie in your garden.  The best part is, the entire plant is edible!  The petals are light and peppery and perfect for the summer salad, the leaves make a great pesto, plus they just are darn pretty in a vase.  My new favorite summer appetizer is so simple and beautiful, I'm certain your guests will happily devour them.


 Stuffed Nasturtium Blossoms

15-20 unsprayed fresh picked nasturtium blossoms (I know you can purchase these at farmer's markets)

1/2 cup ricotta cheese (or softened cream cheese)
1/4 cup grated parmesan cheese
salt, pepper and a tablespoon or two of fresh snipped herbs.  I used chives.

Mix the last 3 ingredients and stuff each blossom with a scant teaspoon.  These are best made right before you plan on serving.  


I read you can even pickle the seed pod.  Trying that this summer!


Follow 
Knitionary


Maple Baked Bacon (AKA Stupid Good Bacon)


You won't believe HOW GOOD THIS IS!  
It's so easy to make and makes the most decadent and delicious appetizer
and of course it's good for breakfast too! 

Ingredients:

thick, meaty, bacon
pure maple syrup

Line a lipped baking sheet with foil and pre-heat oven to 375 deg. F.  Fill a shallow bowl with an inch of syrup and dip both sides of the bacon into the syrup and place on the foil wrapped pan.  Bake in oven for 15 minutes, turn bacon and bake another 10-15 minutes or until good and brown.  Drain briefly and serve immediately. The house will smell great and your guests will kiss you.

When I first served this to my son-in-law, he said, "This is stupid good", thus the name.  Lately we've been cutting the bacon in half before preparing and prefer it that way.

 
Make sure you line the pan with foil to ease clean up!


Nana's Beau Monde Dip

Beau Monde Dip

My Nana made this often.  It's great as a dip for chips and veggies.
As a kid, it was the only way I would eat a vegetable! 

1 cup sour cream
2 tablespoons mayonnaise
1-2 teaspoons Beau Monde seasoning, or more or less to taste.  (it's salty!)
2-3 tablespoons finely grated onion
1/4 cup fresh chopped dill or 1-2 tablespoons dried dill

Mix together and serve with chips or raw veggies.

Rumaki


I'd forgotten how much I loved rumaki until I was served them at a party last week.  As a newlywed, this was my go-to hors d'oeurve--my specialty!  We gobbled these up like they were potato chips.  

Wrap a whole canned water chestnut with a half slice good quality bacon.  Secure with toothpick.  Bake in hot oven (400 F.) for about 15 minutes or until nicely browned, turning halfway through cooking.  Great variations are adding quartered dates, small pieces of chicken liver, and/or cubed Parmesan cheese to the water chestnut and bacon.  Serve with dipping sauce.

Dipping Sauce:  Mix 3 tablespoons jam or jelly with 3 tablespoons prepared mustard, heat slightly. 


Curried Cashews


This is from the Knitionary post, America's Cup, bay view party. 

Veal & Chicken Liver Pate with Muscatels in Cognac


Veal & Chicken Liver Pate with Muscatels in Cognac
 
A coarse and crumbly pate.  Make a few days in advance to improve the flavor.
For the muscatels:
1/2 C cognac or brandy
1/4 lb. muscatels on the stem
Put the cognac and muscatels in a shallow bowl, cover and set aside at room temp for 24 hours.  Every so often mix them up and recover.
for the pate:
4 T olive oil
4 T butter
1 onion, finely chopped
4 cloves garlic, finely chopped
1 t salt
1/2 t ground pepper
1/2 t dried tarragon or 2 T fresh chopped
1/4 t each grated nutmeg and ground cinnamon
1/3 C port
2 T cognac
3/4 lb. lean veal (for scallopini)
1 lb. chicken livers cleaned of all fat and sinue
about 1/2 lb. lean bacon
Heat oil and butter, add onion, garlic, salt, pepper, tarragon, nutmeg and cinnamon.  Fry gently without browning until the onion is soft.  Remove from heat and cool.  Put onion mixture, port, cognac, veal and livers into a food processor.  Puree to rough puree, do over process.  Cover and refrigerate for 12 hours.   Next day, preheat the oven to 350 F.  Line a loaf pan with bacon, pour pate into it and cover with more bacon.  Cover with foil and bake on a rack for 1 hour, maybe a bit more, until it has shrunk a little and looks as though it is floating in its own juices.  (My pate measured 190F when I took it out)  I also broiled the top uncovered for a minute to get the bacon nice and brown.  Pour out juices.  Cover with foil and weight top to compact it, I used canned goods.  Once it is cool, you will have a little more juice at the bottom to drain, remove weights then place in refrigerator until needed.  Unmold the pate and serve with the muscatels on the top.  This slices beautifully and is best served with brioche toast or french breads toasts.   We ate half this weekend and I sliced up the rest and double wrapped individual slices in plastic wrap, apparently it will last in the freezer for up to a month. 

Perhaps it's a bit of an ordeal to make this, but I would make this again in a heartbeat, it was that good.  I think it would look beautiful on an appetizer buffet and would be so welcome.  Sorry, I don't have the source, this was an old gourmet group recipe photocopied from an unknown magazine.

Read the original post, Fall Dinner for Six.

Knitionary

Sweet Potato Chips


Sweet Potato Chips.  There is really no recipe for this except that you need the Mansard Chip Tray and Mandoline which I found at Sur La Table. It's just $20 and a gadget that you will be happy to find a sliver of space for in your kitchen.  Our favorite veggie for chip making is the sweet potato.  I follow directions on the maker.  I do salt and pepper before I pop them in the microwave, they say not to, but we've found it's better to do it before.  You can make these in the morning to serve that evening and they will still be crispy and fresh tasting.  There has never been any leftovers so I can't tell you if they last longer.
Here's what the website says about the chip maker:
Homemade, crispy, fat-free chips are as easy as using your microwave. Slice your own potatoes with the included mandoline, place the slices on the tray and pop them into the microwave for a healthier alternative to greasy potato chips.

The nonstick silicone tray surface crisps your chips, so no added fat is necessary. Works best with root vegetables and fruits, such as sweet potatoes, carrots, beets, parsnips, apples, pears and mangoes. Not recommend for other root vegetables and fruits.

Perfect for snacks or for parties, chips are ready in as little as 3–5 minutes. The easy-to-use slicer cuts your vegetables and fruits thinly and evenly. Stack up to three trays at one time to make larger batches quicker. For microwave use only. Silicone tray is dishwasher safe; hand wash mandoline. 

The original Knitionary post is Winter Dinner Party for 8, view here.

Harvest Tomato and Onion Tart


The tomato and onion tart was part of this beautiful harvest buffet table.

The stunning Tomato Tart...recipe below.

I love this tart recipe as it calls for no egg or cream 
and tastes as good as it looks.
(Source, a vintage Gourmet Magazine)

 Tomato and Onion Tart

2 large onions, thinly sliced
salt to taste
2 T olive oil
butter pastry dough for a single 12 inch tart
1/2 pound dry Jack or Gruyere cheese, shredded, about 2 C
1/2 pound plum tomatoes cut into 1/2 inch wedges
1/2 pound medium yellow tomatoes, about 2, or 1/2 pound plum tomatoes, cut into 1/2" wedges
1/4 C Nicoise olives, pitted

Cook onions in olive oil with salt to taste, covered over moderate heat, stirring occasionally, until softened, about 20 minutes. Remove lid and cook inions, stirring occasionaly, until golden and any liquid evaporates.  Remove from heat and cool slightly.

Preheat oven to 375 F.

Using a 12 inch removable bottom tart pan, partially bake your pastry crust (prick the bottom to prevent bubbling).  Spread onion mixture over dough and top with cheese.  Arrange tomato wedges and olives in concentric circles and season with salt and pepper.  Bake tart in middle of oven for 1 hour, or until pastry is golden.  Cool on a rack and serve warm or room temperature.  Serves 12-16 as part of a buffet.

Original post of the beautiful harvest brunch is here.


Alsatian Pizza with Bacon and Caramelized Onions


Alsatian Pizza with Bacon and Caramelized Onions
source, Epicurious, Fred Thompson

This recipe is for topping only.  You can make your own thin crust pizza dough, or purchase it fresh from your local pizza store like our friend did! 

3 Tbls. butter
2 yellow onions, thinly sliced
1 Tbls. firmly packed light brown sugar
3 slices thick-cut applewood smoked bacon, cut into strips
1/4 lb. Gruyere, thinly sliced
2 Tbls. chopped fresh thyme

Cook onions with butter and sugar on medium-low heat, stirring, until onions are golden brown, about 20 minutes.  At the same time, in a second saute pan over medium heat, cook the bacon, stirring, until crisp, about 8 minutes.  Drain on paper towels.

On partially grilled pizza crust, top each with the onions, bacon and cheese.  Season with salt and pepper.  Return to grill and cook until each crust is firm and browned at the edges and cheese has melted a bit, 4-6 minutes.  Slice with pizza wheel and enjoy.  I loved this so much and think it would be great for a luncheon.

View the original post here.


make your own pimientos, roasting peppers

Making your own pimientos couldn't be easier, and way better than the expensive jars you buy in the store.  When red bell peppers or other mild red peppers are on sale, or if you have a windfall from the garden like I did yesterday, here's what you do:


Bee you tee full.

Slice into large pieces, removing, stem, membrane and seeds.  Place them cut side down on a baking sheet.

Broil on high until black and blistered, 5 or 10 minutes.  Place them in a paper bag, close it up and wait to cool.

When cool, blackened skin removes easily and the peppers will last for a week or two in the fridge, no oil or vinegar necessary.  I didn't think of taking a picture of this until we had eaten most of them.  This is a great start to roasted red pepper soup, great on sandwiches or chopped into just about anything.  And of course makes the best Pimiento Cheese.

Smoked Chicken and Celery Root in Endive


 Smoked Chicken and Celery Root in Endive
I've been making this appetizer for years and it's always popular!

 I'm sorry I don't know the original source of this recipe.  I've altered it slightly for simplicity's sake.

1 celery root, peeled and grated
juice of 1 lime
1 cup shredded smoked chicken (must be smoked, I find it at a local German butcher shop)
1/4 teaspoon ground cumin
1/4 teaspoon salt
a few drops Tabasco sauce
3 or 4 tablespoons mayonnaise

2 to 3 heads Belgium endive

Mix together first 7 ingredients.  Fill each endive leaf with mixture, sprinkle with minced cilantro.  (I used dill because I had it)

It's light and fresh, just a lovely appetizer.


Swiss Chard Chips


Swiss Chard Chips
Move over kale chips, there's a new chip in town!
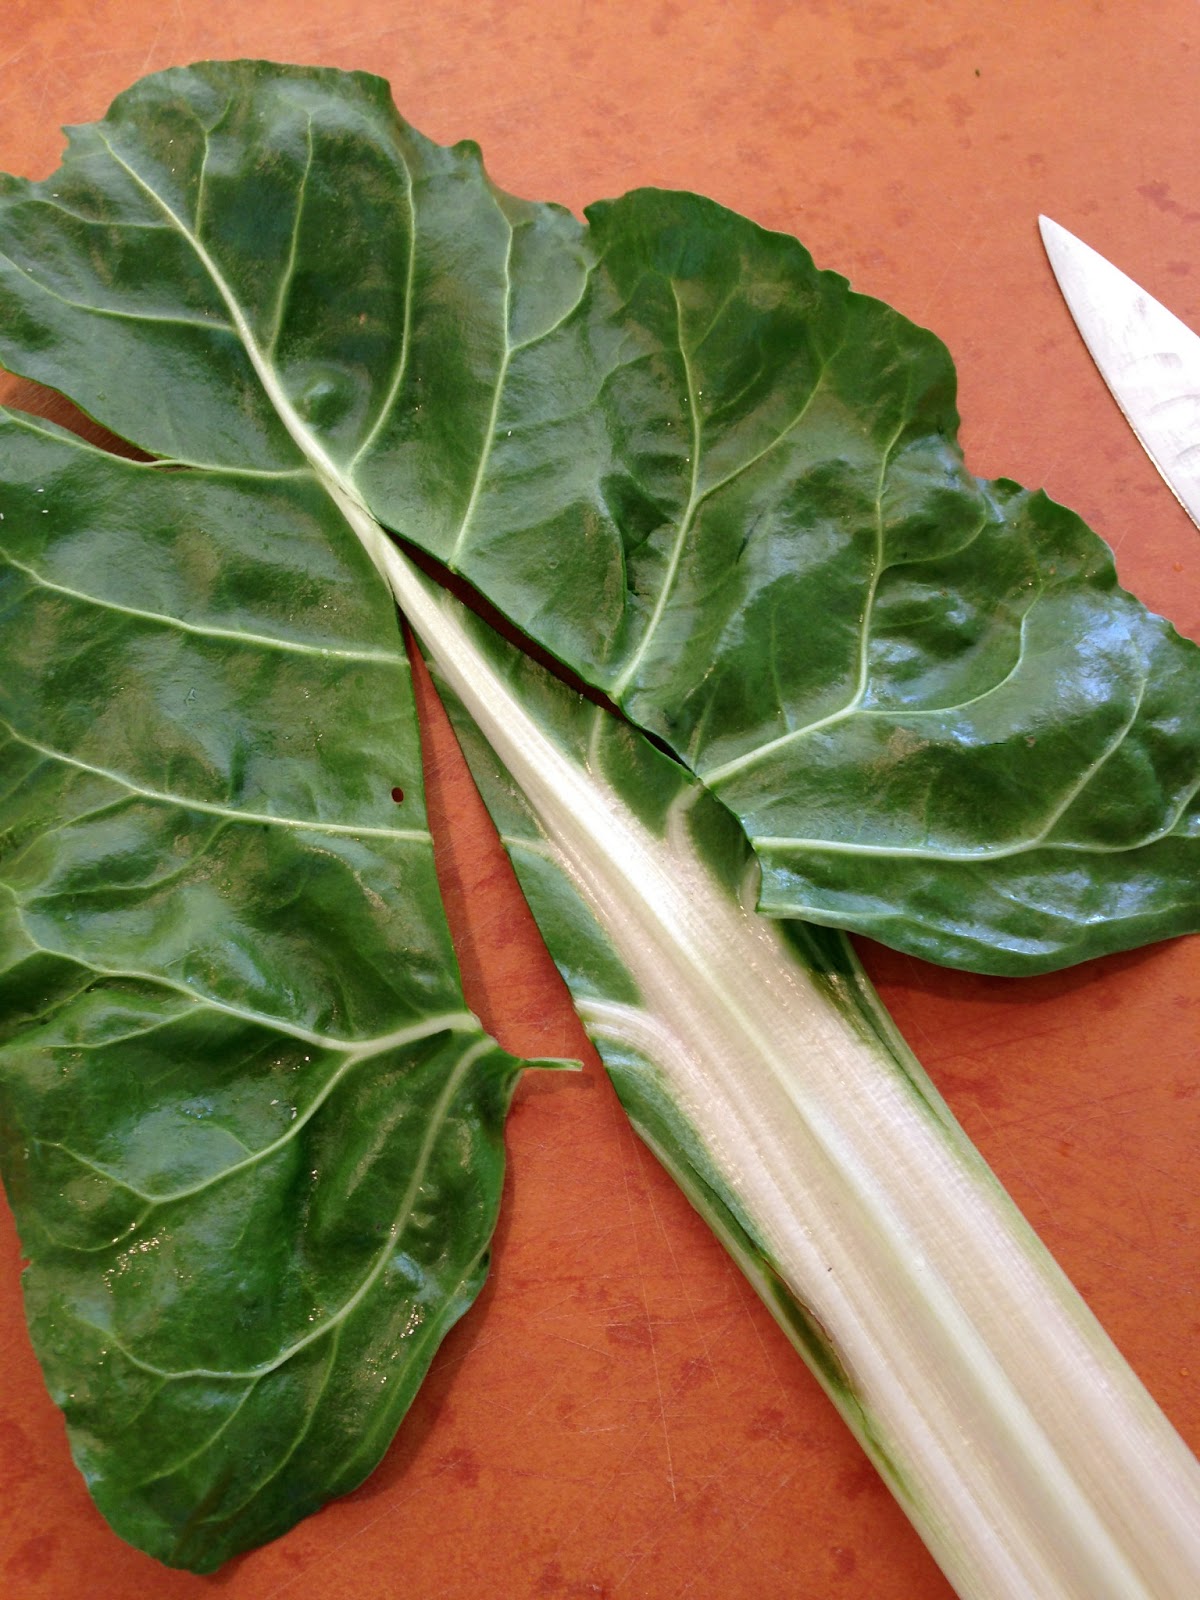
Preheat oven to 350.  Wash and pat dry chard leaves.  Cut out rib with a v-cut.  Break into large chip size pieces, they shrink.  Place on non-insulated baking sheet covered with parchment paper.  Using a Misto type sprayer, spray lightly with olive oil.  Sprinkle lightly with salt and pepper.  Bake in oven and start checking after 6 minutes but may take as long as 10 minutes.  They will darken, shrink and curl slightly.  I also used the microwave chip maker and prepared the chard the same way except they took just minutes to cook.  They were very similar in taste but retained more green color.

So happy I've found a new snack, they are scrumptious!  Next time I have people over for drinks I'm serving these!


Microwave chip maker at left, and on the right the tray is ready for the oven.
